When you’re running a corrugated box making machine, every small adjustment adds up to big impacts on your output. Over my 12 years as a corrugated box making machine supplier, I’ve talked to dozens of press operators who struggle with inconsistent box quality, unnecessary downtime, or even broken corrugated sheets—all because of one often-overlooked variable: paper tension. Tension, simply put, is the force that keeps paper and corrugated layers pulled tight as they move through the machine’s rollers, glue stations, and cutters. Get it wrong, and you’ll end up with wavy edges, misaligned flutes, or boxes that collapse during shipping. Get it right, and you’ll see less waste, faster production, and more reliable boxes that meet your customers’ needs. Let me walk you through how to adjust that tension properly, with the hands-on knowledge I’ve picked up on the job. Corrugated Box Making Machine
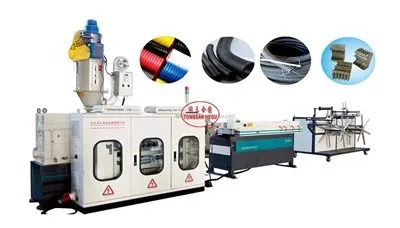
First, you need to understand why tension matters for different parts of your machine. The corrugated box making process starts with unrolling large rolls of liner and corrugating medium. Each of these rolls has its own tension requirement. Liner paper— the smooth outer and inner layers—needs consistent tension to avoid stretching or wrinkling during the preheating section. Corrugating medium, the wavy middle layer, requires a slightly different tension to ensure the flutes form evenly without breaking as they pass through the corrugating rollers. Then, as you move to the glue station, the combined corrugated board needs just enough tension to keep the glue applied evenly, no blobs or gaps. Finally, at the cutting and scoring section, tension ensures the board doesn’t shift mid-cut, which leads to off-sized boxes. If even one of these sections has incorrect tension, the whole line can slow down or stop.
Before you make any adjustments, take a moment to prep. I always tell my customers to check three key things first: the condition of your roll stands, the calibration of your tension sensors, and the condition of your rollers. Roll stands that are worn out—like loose arbors or broken brake mechanisms—can throw tension off immediately, even if you make perfect adjustments later. Tension sensors, which monitor the force as paper moves, need to be calibrated monthly. Over time, dust and paper residue can build up on these sensors, leading to inaccurate readings. And rollers: any that have flat spots, scratches, or buildup from glue or paper will snag the board, causing tension spikes. I’ve seen a new operator get frustrated because their tension was off, only to find a 2-year-old roller with a flat spot that was pulling too hard on one side. So spend 10 minutes doing a quick check before you start adjusting.
Let’s start with the main tension control area: the unwinding section, where your paper rolls come off the stand. Most modern corrugated box making machines have two types of tension systems here: brake tension for the unwinding roll and dancer roller systems for constant tension as the roll gets smaller. Dancer rollers are the most common, and they’re easy to adjust once you know what to look for. A dancer roller is a weighted arm that moves up and down as paper is pulled; its position tells you if tension is too tight or too loose. Here’s how to adjust it: first, run the machine at half speed with a blank roll (no paper) to set the dancer’s midpoint position. If the dancer is above the midpoint, that means there’s too little tension—the roll is unwinding too fast, so the arm is being pulled up. To fix this, turn the brake adjustment knob (usually located on the roll stand) clockwise to add more braking force. If the dancer is below the midpoint, tension is too high—the brake is pulling too hard, so the arm is forced down. Turn the knob counterclockwise to reduce braking force. Once you get the dancer to stay right around the midpoint while running at half speed, you can speed up to full production and check again. I always recommend testing with a scrap of board first, not your good production material, to avoid waste.
Next, move to the corrugating section, where the medium is formed into flutes. This is where tension is extra critical because the medium is thinner and more prone to stretching. Too much tension here, and you’ll stretch the flutes so they’re uneven—some flutes will be taller than others, which makes the board weak. Too little tension, and the medium will wrinkle before it reaches the glue. For this part, most operators adjust the tension between the preheating roll and the corrugating rollers. Look for the tension gauge or adjustment lever on the unwind stand for the corrugating medium. I’ve found that a good rule of thumb here is to adjust tension so that the medium moves through the corrugating rollers without any slack at the inlet, but you should still be able to tug the medium gently (with clean, dry gloves) and have it give a little—about 1/8 inch of give. If it doesn’t give at all, it’s too tight; if it bunches up, it’s too loose. Also, pay attention to the temperature of the corrugating rollers. Hot rollers can make paper more flexible, so you might need to reduce tension slightly when running at higher temperatures, as the paper stretches easier.
Once the medium is corrugated and the glue is applied, you join it to the liner in the double-backer section. This is another spot where tension can go wrong. The combined board needs consistent tension here to ensure the glue sets evenly and the board doesn’t shift as it moves through the long double-backer oven. For this section, most machines use a combination of dancer rollers and guide rollers. If you notice that the board is wavy along the length after the double-backer, that’s almost always a tension issue. If the waves are on both edges, the board is too tight—reduce tension slightly. If the waves are only on one side, that’s usually a guide roller alignment issue, but tension imbalance can contribute. To adjust the tension here, look for the dancer roller at the entrance to the double-backer. If it’s moving up and down rapidly, that’s a sign of inconsistent tension. Adjust the brake or drive adjustment for that section slowly, in small increments—no more than a quarter turn at a time. Wait a minute after each adjustment to let the machine stabilize before checking again. Rushing here leads to over-adjusting, which causes more problems than it fixes.
Don’t forget about the tension at the cutting and scoring section. This is where the board is cut into box blanks, so even a small tension variation can make blanks the wrong size. I’ve had customers come to me saying their boxes are 1/4 inch off, and the first thing I check is the tension before the rotary cutter. If the board is too tight here, it will stretch as it’s fed into the cutter, so when it’s cut, it shrinks back to a smaller size. If it’s too loose, the board will shift during cutting, leading to misaligned scores and uneven edges. For this section, the tension should be consistent with the tension in the double-backer. Use the dancer roller before the cutter to set it—aim for the same midpoint position as you used in the unwinding section. Also, make sure the feed rollers in front of the cutter are clean and free of paper dust. Dirty rollers can slip, causing tension variation, even if your adjustment is perfect.
Now, some common mistakes I see operators making when adjusting tension. The first is adjusting tension while the machine is running at full speed. When a machine is at high speed, inertia makes the dancer roller move more, so you might think you need more tension, but when you slow down, the tension is too tight. Always adjust at half speed, then test at full speed. The second mistake is over-adjusting in one go. Small, incremental changes are way more effective than big turns. One customer told me he adjusted his brake knob a full turn and ended up breaking a liner roll because tension was way too high. Now he uses a quarter turn max each time. Another mistake is ignoring different roll materials. If you’re running a new roll of liner, it might have tighter inner winding, so you’ll need to adjust tension a little higher when you first start the roll, then back off as the roll unwinds. Old rolls that have been sitting in storage can be loose, so you’ll need more initial tension.
Regular maintenance is key to keeping tension consistent over time. I tell all my customers to do a tension check every 8 hours of operation, or whenever you switch roll sizes or paper grades. Also, replace brake pads and dancer roller weights every 6 months—worn pads can’t maintain consistent braking force, and worn weights don’t adjust properly. I once had a customer who was having tension issues for weeks, and it turned out his brake pads were worn down to half their thickness; replacing them fixed the problem instantly.
Once you’ve adjusted the tension, how do you verify it’s right? The best way is to check the finished board. Take a sample of the corrugated board after the double-backer, lay it flat, and look for waves or bowing. If it’s flat and straight, tension is good. If it’s wavy, go back to the dancer roller and adjust. Also, do a test cut: take a blank and measure the length. If it’s consistent with your specification, that means the tension at the cutter is correct. If not, adjust that section’s tension. You can also use a tension meter—my company provides portable tension meters that make this process faster, especially for new operators. But even without a meter, visual checks and test cuts work just as well once you’re familiar with the signs.
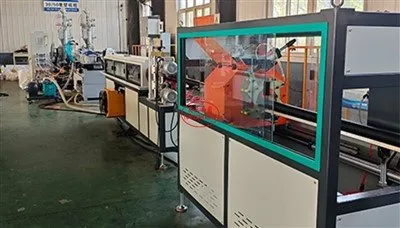
As a corrugated box making machine supplier, my goal is to help operators get the most out of their equipment. Tension adjustment isn’t complicated, but it does require attention to detail and a little hands-on practice. Too many operators either ignore it until there’s a problem, or make random adjustments that make things worse. By taking the time to prep, adjust in small steps, and verify your work, you’ll reduce waste, speed up production, and make boxes that your customers can rely on. If you’re still having trouble getting tension right, or you need a refresher on your machine’s specific tension controls, feel free to reach out—we’re here to help you optimize your machine for the best results.
Double Wall Corrugated Pipe Machine References
- Corrugated Packaging Association. (2021). “Best Practices for Corrugated Board Manufacturing.” Technical Manual, National Paper and Packaging Board.
- Smith, J. (2019). “Tension Control in Web Processing: Principles and Applications.” Journal of Industrial Machine Maintenance, 14(3), 45-52.
- International Corrugated Box Manufacturers Association. (2020). “Operator’s Guide to Corrugated Box Making Machine Calibration.” Industry Publication.
- Lee, S. (2022). “Common Causes of Tension Variation in Corrugated Lines and Troubleshooting.” Manufacturing Engineering Today, 28(1), 112-117.
Qingdao Tongsanhegu Plastic Machinery Manufacturing Co., Ltd.
With abundant experience, we are one of the most reliable corrugated box making machine manufacturers and suppliers in China. We warmly welcome you to buy durable corrugated box making machine for sale here from our factory. Quality products and reasonable price are available.
Address: West of Xixinzhi Village, Sanlihe District Jiaozhou, Qingdao City, Shandong Province, China
E-mail: info@tongsanhegu.com
WebSite: https://www.tongsanhegumachine.com/
