Hey guys, it’s Sam from the adhesive tapes team here, and let’s be real—nothing’s more frustrating than peeling a roll of tape, only to stick it down and end up with bubbles, wrinkles, or that annoying edge that won’t lay flat. I’ve lost count of how many times I’ve seen customers send back frustrated messages, or even watch a newbie on a workbench mess up a project because they skipped a couple of simple steps. As someone who’s been working with tapes for over a decade now, I’ve tested everything from budget craft tape to heavy-duty industrial stuff, and I’m here to break down how to get a smooth, perfect application every single time. No fancy tools, no confusing jargon—just stuff that actually works. Adhesive Tapes
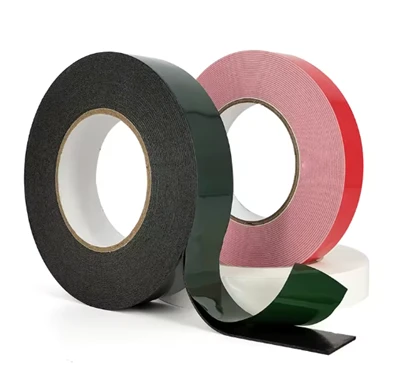
First off, let’s start with the prep, because this is where 80% of the mistakes happen. I know, I know—you’re in a hurry, you’ve got a project deadline, so you just yank the tape off the roll and slap it on. But trust me, skipping prep is like painting a wall without washing it first. The number one enemy of smooth tape is surface gunk. Dirt, dust, oil, even that faint residual old tape glue—all of that creates tiny gaps between your tape and the surface, which leads to bubbles later. I once had a customer call me upset because their double-sided tape kept lifting off a metal shelf; turns out, they’d wiped it down with a greasy rag from the garage. I told him to grab some isopropyl alcohol and a lint-free cloth, and he texted me back an hour later saying it laid flat and never moved. That’s the stuff that works.
Wait, but what if you don’t have isopropyl alcohol? No problem. For most everyday surfaces—wood, plastic, glass—just a microfiber cloth and a little dish soap mixed with warm water works. Avoid paper towels, though—they leave tiny lint fibers that stick to the surface and create tiny bumps. If you’re working on something super important, like a car panel or a custom sign, you might even want to wait a minute after cleaning to let the surface dry fully. Even a tiny bit of moisture can mess with the adhesive’s grip, so rushing that step is a bad call. Also, if your tape is going outdoors or on a surface that gets hot or cold, make sure the surface is at room temperature, too. Cold surfaces make adhesive stiff and hard to spread, and hot surfaces can make it soften too much—you end up stretching the tape and creating wrinkles. I’ve made that mistake myself: tried applying packing tape in a freezing warehouse once, and it curled up before I could even smooth it out. Learned my lesson fast.
Next, choosing the right tape for the job. This might seem obvious, but you’d be surprised how many people use the wrong type and then blame the tape itself. For example, if you’re sticking something flat on a box, a standard acrylic packing tape works fine. But if you’re doing a craft project with curved surfaces, like decorating a phone case, you need a tape that’s flexible enough to bend without creasing. That’s where our flexible masking tape or transfer tape comes in—those have a thinner backing that lets them contour to curves way better than regular duct tape. And don’t sleep on the roll itself! If your tape is old, the adhesive might have dried out a little, which makes it harder to peel evenly. I always tell customers to check the expiration date if they’re using a roll that’s been stored in a garage or attic for years. Fresh tape just applies smoother, plain and simple.
Now, the actual application step—this is where most people mess up the big wrinkles. Let’s talk about how you peel the tape off the roll first. Don’t just yank it straight up! If you pull too fast, the tape will stretch, and once it’s on the surface, it’ll shrink back and create tight, unsightly lines. I prefer to peel the tape off at a 45-degree angle, nice and slow. For long strips, I like to measure a little extra, cut it with a sharp blade (again, not scissors—scissors can leave a jagged edge that’s hard to smooth), and line it up on one end of the surface first. This is key: don’t lay the whole thing down at once. Line up the edge, press that tiny corner down firmly, then as you pull the tape off the backing, you use a smooth, even pressure to roll it down from that first corner to the other end. It’s like rolling a sticker onto a notebook, but bigger.
Wait, but what about bubbles? If you get a tiny bubble in the middle, don’t panic! A lot of people try to pick at it with their nail, which usually leaves a mark or makes the bubble worse. Instead, take a small pin or the edge of a credit card, gently puncture the bubble, then smooth the air out from the middle to the edge. For bigger bubbles, you can actually lift the tape slightly at the edge, pull it away just enough to let the air escape, then press it back down. I’ve had to fix hundreds of these little bubbles, and that method never fails. Pro tip: if you’re working with delicate surfaces, like a painted wall or a thin plastic, use a plastic squeegee or even a clean credit card covered in a soft cloth to smooth the tape. That way you don’t scratch the surface while you work.
Another thing I see all the time is people overlapping tape, which creates a thick, bumpy edge that’s super noticeable. If you need to cover a large area, like wrapping a crate, don’t just lay strips on top of each other. Instead, lay the first strip along the seam, then lay the next strip right next to it, with about 10% overlap max. That way the seam is thin and smooth, no extra bulk sticking out. And if you’re using tape for something like painting masking, make sure the edge is pressed down hard. When you’re done painting, peeling the tape back at a 180-degree angle (straight back, not up) makes for a clean line and keeps the edge from peeling up. I’ve had customers tell me that doing that alone cut their paint touch-ups in half—game changer, right?
Wait, what about double-sided tape? That’s a whole different beast, and it’s another area where people struggle. With double-sided, you have two backings, right? The key here is to peel one backing first, stick it lightly to the surface, then peel the other backing and press it down. If you try to peel both backings at once, the tape will curl up on itself and stick to your fingers, which is a nightmare. Also, for double-sided tape, especially heavy-duty stuff, applying pressure with a roller after you stick it down makes a huge difference. I recommend a small hand roller—you can pick those up cheap at any hardware store, or even use a empty paper towel roll wrapped in a soft cloth. Rolling back and forth a few times ensures the adhesive makes full contact, no gaps left behind.
Let me share a quick mistake I made last year to put this all in perspective. I was helping my cousin build a bookshelf, and I wanted to attach the decorative trim to the edges. I grabbed a roll of our heavy-duty double-sided tape, skipped the prep step, just wiped the trim with a rough towel, and stuck it on. An hour later, the trim was falling off, and it was already dry, so I couldn’t re-stick it easily. I ended up taking the trim off, cleaning the edges with alcohol, and using a fresh roll of tape. That time, I pressed it down with the roller, and it’s still holding strong a year later. That mistake taught me that every step matters—even the small, boring ones.
Now, let’s talk about common myths I hear all the time. Some people say “hot glue is better for smoothness” but no—tape is way easier to apply, it’s mess-free, and with the right method, it’s just as smooth and strong. Others say “you need to use a special tape dispenser” but honestly, a sharp pair of scissors works just fine. If you’re using a lot of tape, a dispenser is convenient, but it’s not required for a smooth application. Another myth: “if tape bubbles, it’s a bad roll.” 9 times out of 10, it’s user error—like rushing the application or skipping the surface prep. I’ve seen our budget tape apply just as smoothly as premium stuff when the customer follows the steps, so don’t write off a roll because of a bad experience.
So, what’s the big takeaway here? Prep the surface, choose the right tape, apply at a slow, even pace, use proper pressure, and don’t panic if you get a small bubble—fix it gently. These steps work for every type of tape we make, from general purpose packaging tape to industrial-grade vinyl tape. If you’re not sure which tape to use for a specific project, just shoot me a message—we’ve been in this game for years, and we can hook you up with the right product for the job.

If you’re working on a big project, a custom job, or just need a bulk roll of tape that’s guaranteed to apply smooth without the headaches, don’t hesitate to reach out to our team for a custom quote or to chat through your needs. We’re here to make sure you get the right tape and the right tips to make your project go off without a hitch. Whether you’re wrapping boxes for a move, doing a DIY craft, or needing tape for a commercial project, we’ve got you covered.
Nano Tape REFERENCES
- Adhesive Tape Application: Best Practices for Surface Preparation, Industrial Tape Manufacturers Association, 2022
- Surface Preparation for Pressure-Sensitive Tapes, Journal of Adhesion Science and Technology, Vol. 35, No. 12, 2021
- Flexibility Considerations in Tape Application for Curved Surfaces, Craft and Industrial Supply Review, 2023
Yiwu Yubang Adhesive Products Co., Ltd.
As one of the most professional adhesive tapes manufacturers and suppliers in China, we also support custom service. We warmly welcome you to wholesale high quality adhesive tapes made in China here from our factory. If you have any enquiry about cooperation, please feel free to email us.
Address: 4th Floor, No. 17 Gantang West Road, Yiting Town, Yiwu City, Jinhua City
E-mail: salesmanager@yubangtape.com
WebSite: https://www.yubang-tape.com/
